How Distress Kitchen Cabinets / Best Antique White Kitchen Ideas For 2020 Best Online Cabinets / Wipe down cabinets to remove any chunks of dirt or cobwebs.
How Distress Kitchen Cabinets / Best Antique White Kitchen Ideas For 2020 Best Online Cabinets / Wipe down cabinets to remove any chunks of dirt or cobwebs.. Take off all hardware, knobs, and handles to protect them from paint splatter. Move your utensils, cooler, toaster, oven, etc., to another room or use alternatives. Distressing is another way of giving your kitchen cabinets a totally different look. 1.cabinets being the most vital part of your kitchen; You can apply the crackling medium on one spot and then spread it around the rest of the surface with a clean paint brush.
When the paint is thoroughly dry, use a light grade sandpaper to sand small areas of the corners and outer edges and trim on the cabinets, including around the handles and knobs. Annie sloan herself recommends applying at least one layer of wax first before distressing because the paint is very chalky and can produce a lot of dust when sanding. Here are the exceptions i've found: There are two different schools of thought of whether to wax before distressing (and after) or to distress first, then wax. Distress remaining cabinets continue working, cabinet by cabinet, until every desired surface has been antiqued.
Transform Your Outdated Kitchen With This Stylish Update Hometalk from cdn-fastly.hometalk.com The whole process took about 72 hours total, including cleaning, paint. The distress process can be done on painted cabinets, stained cabinets or on raw wooden cabinets which will then require further refinishing. Distressing is another way of giving your kitchen cabinets a totally different look. Here are the exceptions i've found: Whether you are looking for inspiration on cool kitchen designs, we have you covered. To really give your cabinet a realistic distressed look, crackling liquid is a must. Brown glazes and tints give a unique warm and natural effect when used to distress kitchen cabinets. We varied the styles and materials to provide an historic interest.
Next, a dark burnishing stain is carefully brushed onto corners and select raised areas.
Brown glazes and tints give a unique warm and natural effect when used to distress kitchen cabinets. How to distress kitchen cabinets. What color is the antiquing glaze? Distress remaining cabinets continue working, cabinet by cabinet, until every desired surface has been antiqued. Your weathering will last a lot longer as a result. To really give your cabinet a realistic distressed look, crackling liquid is a must. Finally, after a stain is applied and. Remove all cabinet doors and drawers by unscrewing the hinges, then empty the contents completely. Nothing says organized like a spice cabinet. Distressing is ideal for creating an aged look that works well with rustic and cottage decor. When the paint is thoroughly dry, use a light grade sandpaper to sand small areas of the corners and outer edges and trim on the cabinets, including around the handles and knobs. Whether you are looking for inspiration on cool kitchen designs, we have you covered. Sand down the entire surface of the cabinet using a 60 to 80 grit sandpaper.
This color helps give cabinets more warmth and can be applied to achieve a subtle or bold distressed effect according to your liking. You need to think about where you'd put your kitchen stuff when you are repainting the cabinets. This is necessary for painted, varnished, and even unpainted cabinets. Attach the doors and enjoy your distressed kitchen cabinets. Next, a dark burnishing stain is carefully brushed onto corners and select raised areas.
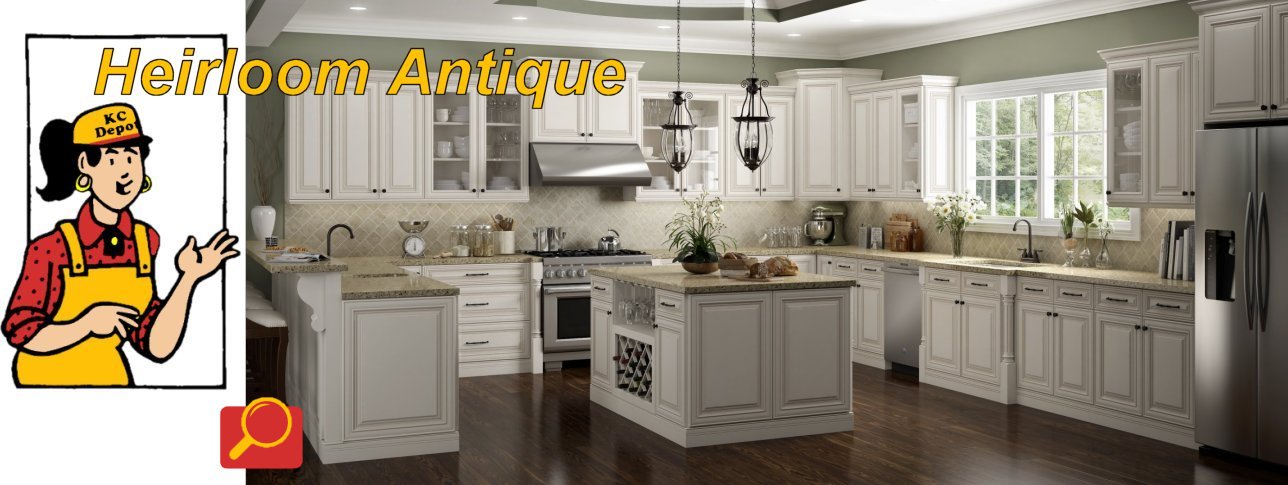
Antique White Raised Panel Kitchen Cabinets Kitchen Cabinet Depot from www.kitchencabinetdepot.com Sand down the entire surface of the cabinet using a 60 to 80 grit sandpaper. Once they're clean and dry, apply your antiquing glaze or paint. Further distress the cabinets by chiseling off small pieces of the corners, denting the wood in some places with a hammer or hitting the cabinets with steel chains. Next, a dark burnishing stain is carefully brushed onto corners and select raised areas. Distressing is ideal for creating an aged look that works well with rustic and cottage decor. There are two different schools of thought of whether to wax before distressing (and after) or to distress first, then wax. Here are the exceptions i've found: If using a glaze, let it sit momentarily, then wipe with a damp cloth to remove excess.
Once you're done sanding, clean the cabinets with a tack cloth and a damp rag.
Distressing is ideal for creating an aged look that works well with rustic and cottage decor. Make sure to stand back every now and then to ensure the overall effect is consistent. Using a wet cloth, gently rub across the surface of the cabinet door in a back & forth motion to remove as little or as much paint as you like. Annie sloan herself recommends applying at least one layer of wax first before distressing because the paint is very chalky and can produce a lot of dust when sanding. Take rosin paper and tape it over the floor and countertop. You can put a beautiful table in the kitchen or even in the living room to your room. 1.cabinets being the most vital part of your kitchen; Blame it on our love of secondhand shopping and diy (the style blends both of our favorite hobbies). Move your utensils, cooler, toaster, oven, etc., to another room or use alternatives. When the paint is thoroughly dry, use a light grade sandpaper to sand small areas of the corners and outer edges and trim on the cabinets, including around the handles and knobs. It roughs up the surface and gives the stain and paint something to stick to. In this video i show you how to distress cabinets with ease. Once they're clean and dry, apply your antiquing glaze or paint.
The whole process took about 72 hours total, including cleaning, paint. My distressed cabinets give a fresh new look to my old, dark ugly cabin. Attach the doors and enjoy your distressed kitchen cabinets. Calgary cabinet painters can help if you you don't want to do it yourself. 1.cabinets being the most vital part of your kitchen;
Distressed Kitchen Cabinets Pictures Options Tips Ideas Hgtv from hgtvhome.sndimg.com Put on a pair of rubber gloves and wipe cabinet faces with a damp rag to remove the surface dirt. Get out the hammer to give your cabinets a bit more character unlike regular paints, the key to getting a great distressed look with chalk paint is to make your cabinets look old, and a bit banged up, before you start painting. The distress process can be done on painted cabinets, stained cabinets or on raw wooden cabinets which will then require further refinishing. Attach the doors and enjoy your distressed kitchen cabinets. You need to think about where you'd put your kitchen stuff when you are repainting the cabinets. Move your utensils, cooler, toaster, oven, etc., to another room or use alternatives. Remove all cabinet doors and drawers by unscrewing the hinges, then empty the contents completely. Here are the exceptions i've found:
Annie sloan herself recommends applying at least one layer of wax first before distressing because the paint is very chalky and can produce a lot of dust when sanding.
Dry distressing apply one coat (or two) of paint to your piece and then let it dry completely. Once they're clean and dry, apply your antiquing glaze or paint. Whether you are looking for inspiration on cool kitchen designs, we have you covered. This type of solution will create little cracks on the wood's surface, making it look as though it is truly an aged piece of furniture. Allow the topcoat of varnish to dry before you apply a second coat. The whole process took about 72 hours total, including cleaning, paint. Take off all hardware, knobs, and handles to protect them from paint splatter. Here are the exceptions i've found: Wipe down cabinets to remove any chunks of dirt or cobwebs. Get out the hammer to give your cabinets a bit more character unlike regular paints, the key to getting a great distressed look with chalk paint is to make your cabinets look old, and a bit banged up, before you start painting. Distressing to achieve antique look. Distress remaining cabinets continue working, cabinet by cabinet, until every desired surface has been antiqued. If using a glaze, let it sit momentarily, then wipe with a damp cloth to remove excess.


0 Komentar